
The following steps list out how to install an eSIM for Android phones, specifically for Samsung and Google Pixel phones.
**Note that the instructions may differ for different Android phone models.
SECTION 1: ESIM COMPATIBILITY
Let’s start with ensuring your device is eSIM compatible here.
|
Here are a few things for you to take note of before we begin. ✅ Ensure you have a stable internet connection. ✅ Avoid interrupting the installation process. ✅ Scan the QR Code from another device with your phone. |
SECTION 2: INSTALL ESIM
QR code method
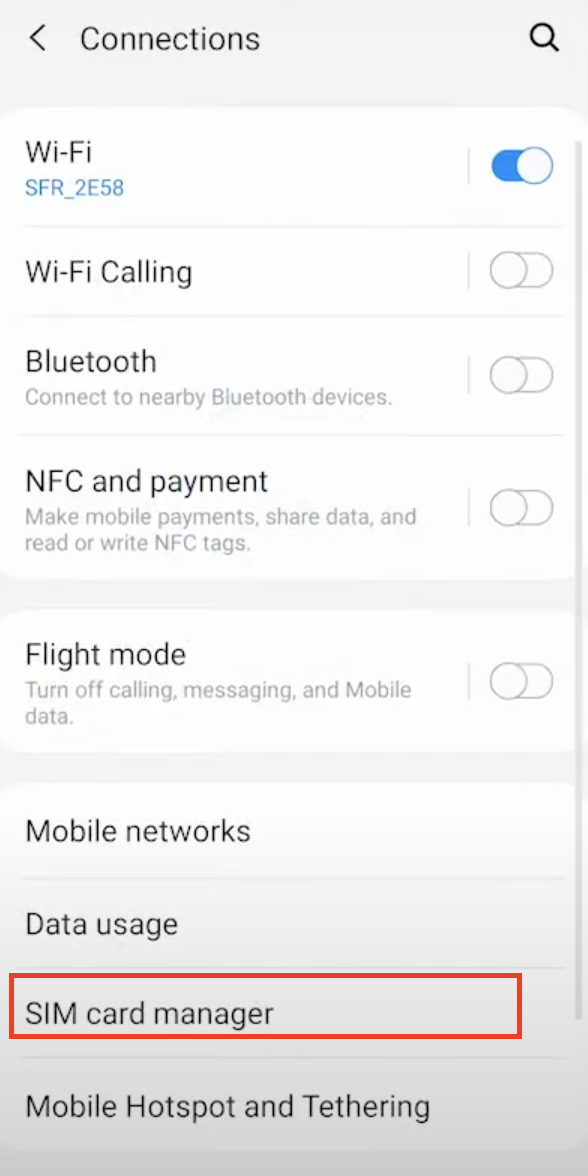
Step 1: Go to "Settings" > "Connections" > "SIM card manager".
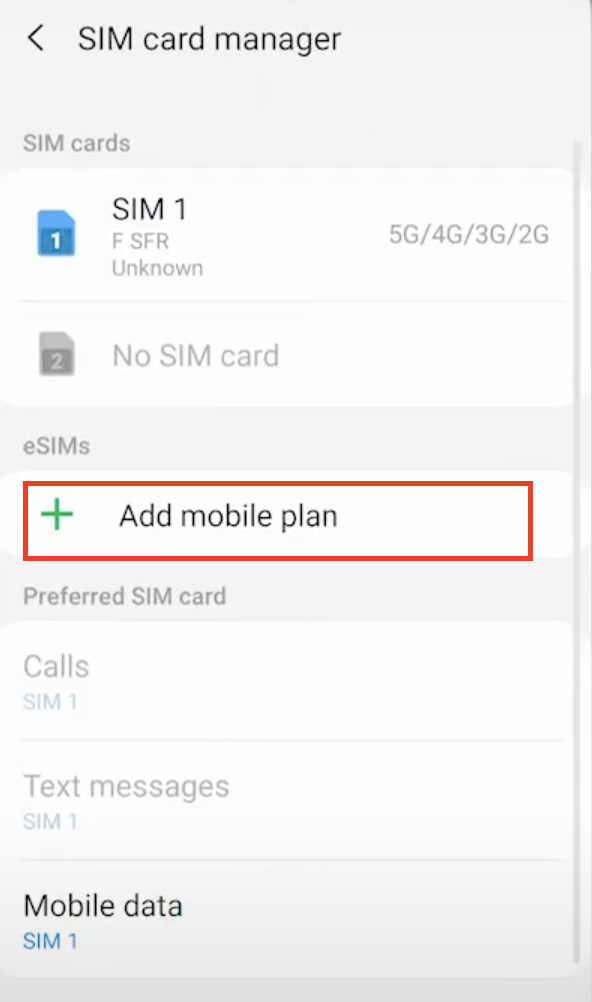
Step 2: Click "+ Add mobile plan".
Step 3: Click on "Scan carrier QR code".
Step 4: Open the eSIM QR code we sent to your email using another device that is different from the phone that you are trying to install the eSIM into and scan the QR code.
| 💡 TIP: Search for an email with the subject "Here comes your Jetpac eSIM!" in your inbox. |
Step 4: Select the "Confirm" button to add your eSIM to your device.
MANUAL METHOD
- TAP Connections.
- TAP SIM manager.
- TAP Add eSIM.
- TAP Scan QR code.
- TAP Enter activation code. This information is available in the email or in your Jetpac App.
5. Choose a label or customized label for your eSIM.
6. Under the Default Line page, select your eSIM for cellular data only
7. You should see your new eSIM under your Cellular Data or Mobile Data Plans.
SECTION 3: TURN ON YOUR ESIM WHEN YOU ARE TRAVELLING
3.1 Selecting the correct eSIM for mobile data
Step 1: Go to "Settings" > "Connections" > "SIM card manager" > "Preferred SIM card section".
Step 2: For the "Mobile Data" section, click on it and select the Jetpac eSIM.
3.2 Enable Data Roaming
Step 1: Go to "Settings" > "Connections" > "Mobile Networks".
Step 2: Switch on the “Data Roaming” option by clicking on the toggle button.
That's it! You can now enjoy instant connectivity and travel with peace of mind!
Comments
0 comments
Please sign in to leave a comment.